
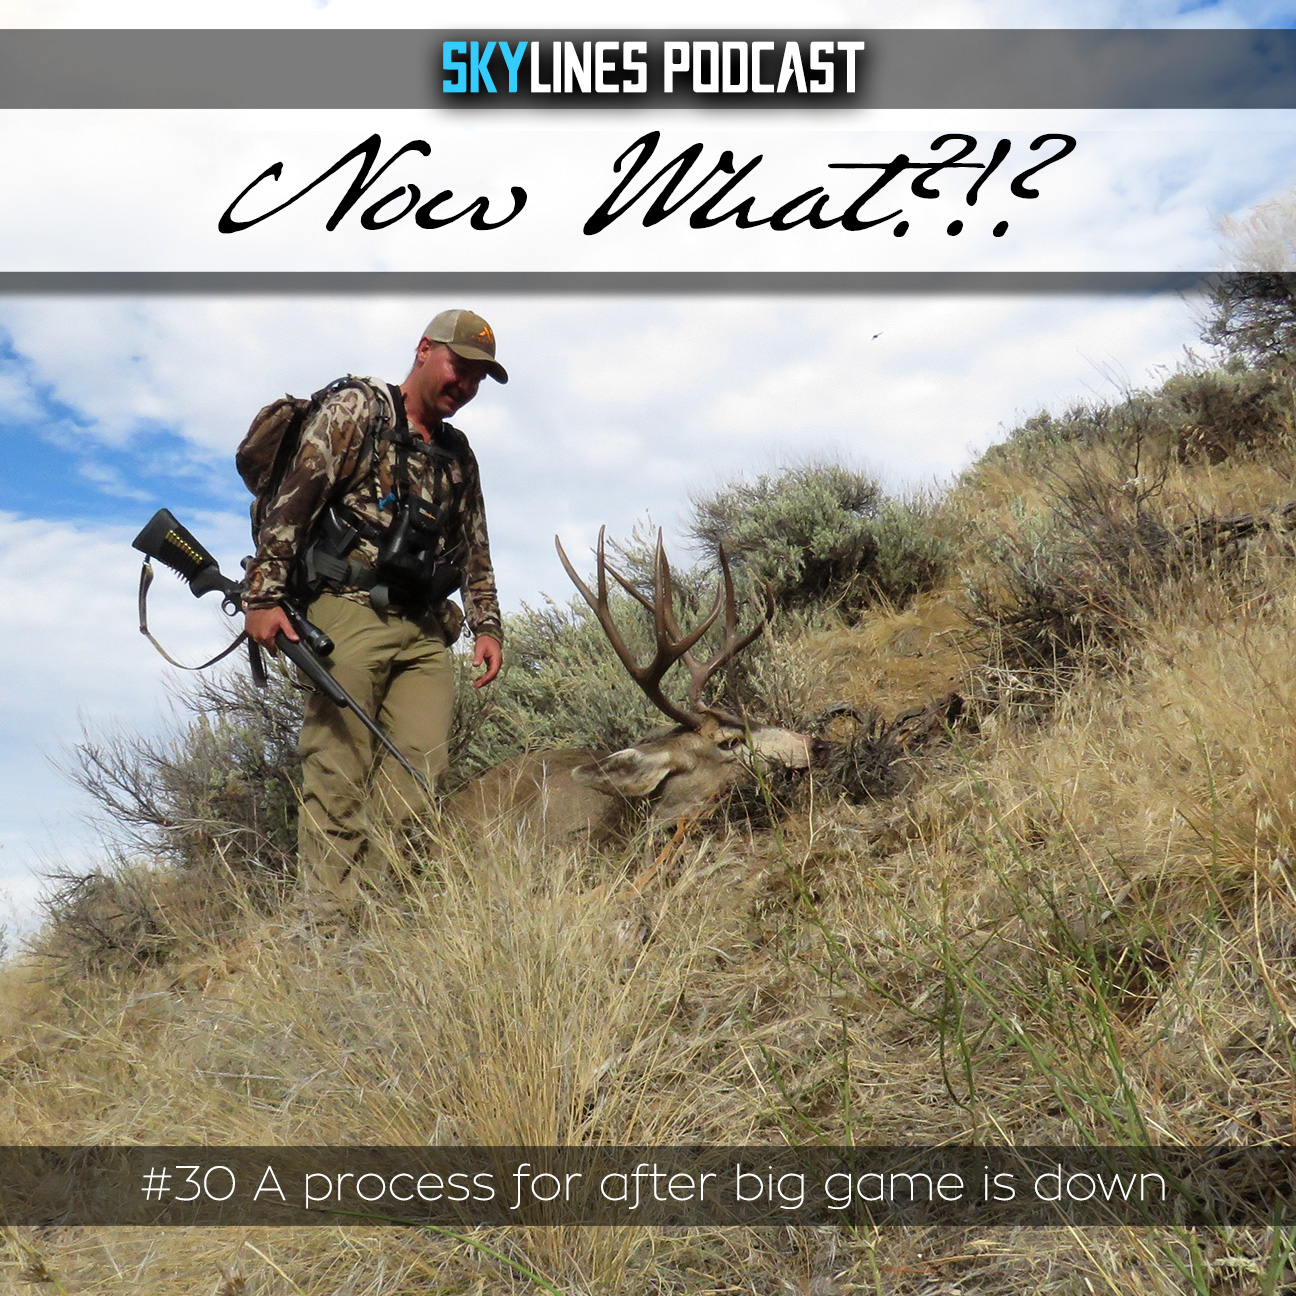
Okay, howdy folks, Brian Husky here again talking with you. And today's gonna be something that I haven't really done before in the sense that it's not gonna be an essay or a story per se, but it's something that I feel could be valuable to share with people that are considering hunting alone and what it's actually like when you have an animal down alone. I think a lot of what I want to do with the Skylines podcast is to empower people to feel that going into the backcountry or frontcountry for that matter, wherever you're hunting. You don't have to have somebody else along with you.
And for better or worse, that's just an option that I want people to know should be open to them. So I'm hoping that this is my program as a solo hunter and it's worked for me. I've taken out eight big game animals, five bucks and three bowls all alone. So it's like if I can do this, I know that you can do it.
And so my hope is that an outline like this of what to expect and the steps that I take can give you confidence to hunt alone. So I feel like there's also a lot of fodder out there regarding what to pack the photo tips, field dressing, stuff like that. So I'm probably going to skim pretty light on those things. But if you do have any questions specifically, yeah, drop it in the comment and I'll be super stoked to get back to you and have offered whatever advice I have for whatever question you come up with.
All right, so yeah, you've got an animal down. First thing, congratulate yourself. Like, take, I mean, for me, I like to take a knee at first sight as soon as I see that antler is down or the body is down on the ground. And for me, that's always following some degree of tracking.
But man, I just like to, you know, ground myself in that moment and soak it in because we spend for the most part 11 months out of the year looking forward to hunting season and daydreaming of that exact moment. And so to me, that's a real important thing to acknowledge and like, there's a lot of adrenaline flying. And so there's a lot of things that you can just go by and such a blur and like everything in life, you know, you can all look back on things and be like, oh man, like at the moment, like I didn't even realize this or I didn't even think to recognize that. It just all went flying by.
So, you know, maybe by verbalizing it and sharing it with you now is like something to think about. It'll help you remember it because it's taken me a long time to get to where I actually stop and be like, you know, just breathe and think about what you're about ready to walk up on and everything that went into it. So yeah, that's the first thing I like to do. Yeah, when I get to that animal, the next thing I really try and do is also taking either with the animal and think that animal.
As you guys who have listened to some of my stories are aware, yeah, you know, hunting and taking an animal's life is a big deal to me. I'm not one of the people that just thinks, oh, it's, you know, animals will put on this earth for man to do with what he wants. And I mean, a lot of people believe that. And that's fine, but that's just not me.
So I like to take a knee and be like, and think that animal. Next thing that's kind of funny that I always, almost always forget. So I'm putting this down as a reminder to myself, but also an acknowledgement of like, man, I gotta remember to pull your tag out of your wallet and tag the thing. There have been certainly times when I'm deep into the process and I'm like, oh, yeah.
I should have actually tagged this thing. So yeah, I'm putting that down as the reminders that like kind of like the first thing to do. Take out your wallet, dig out your tag, whatever, not your tag, put that on there and enjoy that moment too. All right.
So some other things will cruise through here right off the bat, time frame considerations. Like, okay, what time is it? Because you're probably gonna need, you're gonna be there a couple hours, two hours, maybe three hours, you know, depending on a lot of different things. So put yourself in that time frame and what your any limitations you may have, whether it's getting dark, whether it's being somewhere, are you going to be able to complete this on your own?
You know, if you're looking at three hours in the field, they're dressing it and getting it all before you're actually packing. So, you know, think about that. And then I'll also write off the bat. It's really important to have your temperature considerations.
Like what are we looking at? How long has the animal been on the ground? How much sun or shade opportunities are there? Is temperature and time a problem for the stability of the meat?
I'm not an expert on what those numbers and ranges are. So I'm not gonna say how long is too long, but it's not uncommon to be in scenarios where you'll leave an animal overnight before maybe even finding it. You may be tracking whatever. So, you know, there's roughly a 24-hour window there, I think, when it's pretty standard amount of time that things can be on the ground, but that's something to consider.
Like if you need to really get to work fast or if you've got time, you know, get yourself in the right mindset for that. You know, photos are the next thing that I definitely jump right into. And with me, I'm probably taking photos the whole time anyways, even leading up to that. But that's another thing that has just tons and tons of probably other content out there.
I don't listen to podcasts. And so I don't, I imagine that there are field guides to taking your grip and grip photos, but if there's not, then maybe someone will tell me and maybe I'll think about talking about that in more depth. But right now, a couple of things I would just drop. Your photos are gonna be the best if you can get your animal into full sun or full shade.
The toughest photos are when you're in just this blotchy light, which is super common when you're in the woods. And if it's all possible to move or do a different direction or whatever, but full sun or full shade, another thing I would say, leave your backpacking your binoculars and stuff like that on for the pick because that helps tell the story of the fact that you didn't just shoot this thing out the window of the truck. And you're probably not wearing jeans and a t-shirt and running shoes. And so, you know, your pack and your gear is kind of part of the story.
And I like to always try and think of that. And you know, make it look like you're, you know, you walked up on the animal when you take your pictures as you were, with what you were wearing and as you looked when you walked up on the animal. Or not, if you don't like that stuff, then don't do it. But those are just things to think about.
And then one last thing on video, or on photos is to use the video mode, especially if you're by yourself and you prop the camera up somewhere. Like we've all done the timer and sprint back and forth. You're doing, you know, sprints to hit the button and then get there in time and act natural. So that's fine for some of the still photos, but most, you know, the camera that you're pulling out of your pocket or the smartphone, you know, the picture quality is so good on these things today.
I'd say 90% of them out there. You can just roll that thing on video. And then all you have to do is play that video back on your device, pause it, and then take a screen grab of the spots that you really like for those pictures. And that's probably gonna be a high enough resolution image for you to do whatever you want with.
And then you can have, not to mention, the audio and anything else that is part of that moment. You know, you get 10,000 awesome still images out of, you know, a couple of minutes of video. So consider that tip. So now it's time to get to work.
I like to take off my pack, get my bows someplace where it's out of the way. If it's a rifle, you know, unloaded and all that, put the broad heads away on any arrows that are out so you don't step on one or something like that. Kind of create a little base. And then I get, you know, get into your backpack and get out your knives and get out your game bags and take a mental note of like where you're gonna set that stuff because there's very seldom a field dressing scenario that doesn't involve somebody looking around for five minutes, but where the hell did I set my knife?
And they're really easy to lose in all of the mess of a field dressing process. So kind of be like, all right, I'm gonna put my knife on this stump or whatever every time and then stick with that. Now, I use those razor knives. That's been kind of a kind of a tough thing for me because I'm so sentimental about the old Gerber knife that I've had for, I don't know, 30 years and used on pretty much every animal I've ever killed.
So I still carry this old fixed blade, you know, standard knife if nothing else just because it's sturdy. And there are a couple of steps that we'll talk about that I do use, you know, having a real strong blade helpful for, but get that razor blade out or that razor knife and then also I get the extra blades out because I'm probably gonna change the blade at least once during that process. Maybe not, but if I need extra blades, it's good to have them out before I'm, you know, all bloody and dirty and then have to go digging through my entire backpack with 30 hands. So something to think about there.
For speaking of game bags, I used zippered pillowcases. I get the extra large king sized pillow cases. They come in a boar pack, which is perfect. And I really love having that, they're cheap.
They breathe, they're washable and they've got a zipper on them. So you can keep bugs and dirt and keep stuff clean. I know there's tons of fancy game bag options out there that do those things too, but they're probably not as cheap as the pillowcases that I've used. I'm on my second set note, I've been doing that for like five years.
So I've used them for two or three years each before I've replaced them. So they've lasted well. And that's putting deer and elk in them. So I don't bother with latex gloves.
I know some people do. I don't really see the purpose in it. So I don't mess with that. But if you do, you know, have that stuff ready.
And then another thing to think about, like, all right, you're fixing to get into a whole bunch of work. And it's a good time before you all are all sweaty and that much more dirty and bloody to eat and drink while you're clean. And get yourself kind of topped off because you're going to be going at it for quite a while in this process. And so yeah, take that time to be like, all right, getting ready to go on this next chapter and it's a physical deal.
So get yourself topped off and be ready to go. And all right, so moving on, the next thing is moving the animal to the ideal place. A deer you can drag pretty good to move if you need to get it into a clear area. You know, I've never had a crit or die in a real bad spot, but it's just a matter of when, not if, that will happen.
And so hopefully you're in a spot that's pretty good. With elk, I mean, I can move a bowl a little ways by myself, but more than, I don't know, more than a few yards is really probably not likely something you're going to be able to do. So hopefully you're in a position that you can work with if it's an elk. But yeah, take a look around and be like, okay, where am I going to not have to be stepping in the middle of logs or rolling my ankle on rocks or having a thing roll down the hill.
And if it is on a steep hill, and I have killed critters on steep hills before, I'll go ahead and I'll tie it off so that it doesn't keep sliding down the hill because it will keep inching and inching and inching if it's not tied off. And the next thing you know, you're, you know, migrating down the hill into another spot that maybe is not a good place. So I don't do the tying legs up or things like that because it doesn't take me that long to take legs apart. So I don't mess around with tying off legs for the sake of taking the animal apart.
But I do definitely tie that thing, tie the head off at a minimum, if it's looking like it could slide downhill. And then as far as like orientation of putting it uphill and downhill, I don't know, I've been thinking about this for a while and I can't think of a scenario when I've really cared that much. I think in general, I'll put their feet facing downhill and their back facing uphill and kind of perpendicular to the hill so they're like, they're walking side hill and then just tipped over. But I don't know, I can't, you know, I don't think it would necessarily matter if the thing was facing straight up and straight downhill either.
So, you know, well, like I said, there's tons of different methods. If you were doing a process where you're going to like cut open the guts and pull the, you know, like a traditional, just gutting it like a fish and you know, absolutely consider that. But for what I do with a gutless method, that's not really that critical. So the first thing to start doing, that I do is I get busy skinning.
Skinning is important to do quickly in the process to really release heat. And so right back at the butt, there's usually a pretty big area around it that is just skin and not fur. And so what you can do is you can pinch that skin and take a pretty good pole and then get your knife and get your first cut going right there. And so I'll sit there and I'll pinch that skin and I'll make that first cut and then start going usually straight down the back of the leg.
And that line that you cut down the back of the leg, it doesn't have to be pretty. And then from that line from the butt, I'll go up right around the tail and then I'll get my knife right on the backbone. And then I'll run my knife right up the back. And again, that cut just needs to be a cut.
It does not have to be pretty. So don't sit there in waste time trying to make a straight line and don't be afraid to pull really hard on that skin. And especially in the area when you get up around the ribs, you can really pull and make huge gains without even using the knife. So don't be afraid to really be physical, pulling on that hide and getting that skin off.
You wanna be careful to try and keep that hide always peeling back like you're pulling the sheets off a bed and not letting it keep flopping back down forward because as it flops forward, a whole bunch of hair will come off and inevitably there'll be a whole bunch of dirt that'll come out of that hide also and it'll just make things messy. So once I get those cuts going, I try and cover enough ground that I can pull that flap of hide back and it's big enough of a flap that it will lay on itself and not keep flopping back down and kicking hair into the clean meat. Something to consider is if it is a big critter that you're going to mount, you're gonna wanna stop that reckless skinning at the shoulders and then do a very nice clean line up all the way up to the back of the skull between the ears and the base of the antlers. Nice clean straight line there.
And then you'd wanna also do nice clean straight lines all the way down from behind their shoulder and leave plenty of extra down below their shoulders. But barring that, that's not happening. Yeah, I'll just kind of slash and thrash and get all that skin all the way up to the neck. And then I usually go right down, I'll split and I'll kind of take the ears off and then open up that neck also.
And I'm just sticking with this one side where the animal's laying on its side on the ground. So you're kind of just working one side at this point. And I'll go real sloppy around the knees also and I'll cut the hide anywhere I want as needed to pull it off in big chunks. But however I need to get the legs freed up if I wanna do another line up the front of the leg, front or rear leg, I'll do that as well.
And then just no point's getting down past the, you know, that first big elbow where the good meat ends. So yeah, I'll just spin around that real quick and get that hide off. Let's see here, let's look at that back, getting that first time quarter off. I'll push that knife blade off, do a lot of pushing and feeling with my fingers to really feel where those bones are at.
And kind of back there in the pelvis slash hip bone slash last vertebrae, you can feel a lot by pushing around in there with your fingers. And I'll take the knife straight down the vertebrae in the back and I'll go forward in a cut that goes just to where the kind of where the front of the hip would be. Like if you had your hand in your front pocket, like that portion of the anatomy. And you can really, if you feel the leg and you run your hand up the thigh, again, you can really push with your fingers and feel where those muscle groups kind of come together.
And you can keep all of that intact. And then so from running your hand up the inside of the thigh to the kind of the crotch of the hip there, you can go straight up with your knife and basically tie into that cut that was on the backbone. And that'll kind of be the junction between that hind quarter and the back strap. And you can kind of delicately pull through that upper part of the hind quarter and really just kind of scallop that meat off of the backbone and off of parts of the pelvis there and get down deep all the way down to that ball.
And then I'll bend down and I'll pick that leg up and I'll stick it over my shoulder and over my head. And then I'll kind of just start to put pressure on that from the inside and then I'll carefully cut with my knife on the inside of the thigh down in that groin area. And I'll be really careful not to go too deep. When I'm right up against the gut there, you'll quite possibly pop part of that stomach cavity, but you've got basically one warning shot.
When you pop that stomach cavity, you're still okay. You'll get a blast of air. But if you pop further than that, then you'll actually pop part of the actual guts and testings and then that's when you really have a problem. I've never had that happen, but I'm sure that would not be ideal to have stomach contents coming out even into the cavity.
So yeah, be real careful with that. Pressure will really help you tell and feel with your knife where you need to do those cuts. And also be very careful not to get that, the cock there because that obviously has the urine track in it and you'll see it, especially you'll see it once you get one side done when you do the second side. So yeah, just be real careful with your knife, push, get pressure on it.
And as you get more pressure, your knife will really lead you where it needs to go because the cuts will kind of happen automatically. And that big femur hit ball will start to become visible, use your hands to feel. And you can kind of tell where you're going and let that knife lead through. And then what I do is I get everything cut through, popped off, pop in bottom, I'll go kind of back and forth.
I'll check all the way around, make sure that thing can swivel. Then there's a great big heavy duty tendon that's kind of holding everything together from the inside and that hit ball joint. And so once I get to that point, then I'll make sure that I have everything ready. I'll have a game bag laid out and I'll lay that game bag out into place that's in the shade.
If I don't have shade, and then I'll open that game bag up, game bag up so that when I have that high quarter off, I've got a clean place to put it because that should still all be really clean for you. And if you're ready and don't cut it off and go walking around looking for a place to put it, stuff not before until you have your place ready. So get that bag ready. I'll just lift that leg up and you know, I'll have the exposed opening there between the Achilles tendon and that big and the leg.
So you got a real good handle there. And depending on the size of the bowl, that's gonna be a real heavy lift for one dude. Or depending on the size of you, it could be a heavy lift. But if I can do it, anyone can do it.
And I'll just get everything cut free and make sure I can pick it up. And then I'll set my knife down, get my footing and just do a straight lift and then carry that huge leg and then get it laid down. The next thing I'll do, you know, you can cut the knees off if you want. If you're packing out a full quarter with bone in, then you're gonna wanna cut that off.
But I usually bone out my meat. And so there's no point in cutting at the knee because you're gonna bone it out anyways. But if you are going to take the full quarters with that bone in, the femur in, you definitely can cut it at the knee. And you don't need a knife, you don't need a stick with a saw.
You can absolutely do it with a knife. It's a matter of, it's hard to teach, especially in this format, but a knife will do it very easily. So I can't really get into more of that without being able to show you. But use your knife and you can take that knee off.
The next thing I'll do is I'll get up to that front quarter and same thing, I'll make sure I have a place ready. And cutting that front quarter off is really, really easy. If you haven't done it before, that shoulder blade, you know, the whole front shoulder is connected by basically a lot of surface area and no real hard major point. You know, the rear's got that absolute point in the hip, but in the front, it's just a whole bunch of broad area of that all inside that shoulder.
So, you know, I'll cut that sucker off again, I'll plop off the hide down below the, over the meat ends. I won't worry about taking the knee off at this point because at this point, I just wanna get these big chunks of meat off the animal so that everything is opened up and cooling off as fast as possible. So I'll get that front quarter off and I'll set it on the bag. The next thing I'll do is that back strap and that's everything that's between where you're cut at the hind quarter stopped and all the way up the neck.
And I like to run quite a ways up the neck with what I leave all in that long back strap. So I mean, this thing's gonna be as long as your leg and I'll take that knife with that straight down the vertebrae and I'll do the same thing all the way up the back, clear to the neck and then you can really pull and feel the muscle groups and you can really tell where you can make those cuts to keep all of that together into one super long cut and this stuff's really visible when you're doing it. Then the last thing for that side, you know, there's gonna be miscellaneous meat from the neck that you're gonna want to cut out and I'll put that meat into a, well, okay, so I'll take that back strap and I'll have a third bag now and that third bag is gonna be the miscellaneous meat bag and so that's where I'll put the back straps, the neck meat and the tenderloin. And the tenderloin is the last part that we'll do before we roll the animal over and for that.
You can do a lot of this with your bare hands by feeling the top of that gut and pulling that gut bag basically kind of pushing down and sliding your hand between those last few vertebrae. There's a couple of vertebrae that just have those fins on them before the actual rib stop and you can slide your hand down in there and you can really push that gut cavity down and you can reach in there and you can really feel that strand of muscle that's right up against the inside of the backbone and that's the tenderloin. A lot of that you can work with your hand and get it freed up and then you're gonna need to make a cut at the very front end, at the very forward end of it where it attaches and at the aft end where it attaches. And so again, this is really tough to explain without doing it in person but that's how I do it.
I only use a couple of cuts with a knife. It's really tight quarters to try and get your hand in there much less your hand and a knife without popping that gut cavity so it is tricky but that is how I do it. So at that point I've got the front quarter, the rear quarter and this miscellaneous meat in a bag and I'll go ahead and ready to flip that animal over now and repeat all of those steps. One thing to think about also when you're doing that is in Idaho you have to have proof of sex in addition to the head.
And so for that can include or does include leaving a portion of the scrotum attached to the meat of the thigh. And so what I do on my, if I didn't have it, I usually don't do it on the first one, I'll do it on the second one. And so that's kind of a tricky process but basically you can grab the nut sack and you can make a few careful cuts around it. And actually I should have mentioned this while skidding because you don't wanna go when you're skidding and throw all of that out.
But when you're skidding out that first leg, I actually don't skin around the cocking balls at all. I only skin around the leg that I know I'm gonna have to take. I don't even remove all of the skin off of the belly because there's no point in it. There's no point in skidding all the way around the belly because we're not taking anything from that very bottom part of the animal.
So same is true with that cocking balls area. I never have to touch it on that first leg. And then on the second leg, that's when I need to take those and take the nuts and basically turn the whole bag inside out. And you don't need a knife to do that.
You can push the actual balls out of the sack and just basically just peel the skin off. And it does pull off of there. And you can take a portion of it that's like, all right, I'll usually take like what's the comparison here. I don't know, the size of your fist is basically about how big that is.
And I'll cut about that much of it off. And then I'll carefully cut around and I'll just push the balls off the balls out. And so you'll just be able to pull it apart and it'll tear apart and you'll basically have the balls in one hand and then just the hairy scrotum in your other hand. And then with that, you just make sure that you have a portion of that attached to that other leg and the rest of the body.
And you make your cuts carefully where you gotta be really careful, but that's how you gotta do it to be legal, at least at Idaho. And I will leave that piece attached to the meat permanently until I get home. So something to be aware of. And then I, but I never have to actually cut anything.
You're never cutting the lines to the balls. You're never cutting any of the urinary tract. You're never cutting any of the cock. You never touch any of that because you're just taking that leg and that leg with that portion of the skin that you need to go with it.
And so you really don't even have to get into any of that other stuff. So yeah, we've flipped. We've repeated all of those process. Oh, where am I at here?
The proof of sex. Now what now? And once I've got all those quarters off, now I'll take them and I'll go back to that first quarter and I'll debone it. And to cut out the bones out of a quarter, I basically, yeah, I don't try and cut the meat off of the leg.
I basically try and cut the bone out of the leg, if that makes sense. I'll take that hip ball and run my knife literally just right down that bone and follow that bone with my knife and then just basically follow it to the knee, things get a little funky in the knee and then below the knee, you've got that big calf. There's a bunch of good meat in there. But I basically just like to hold onto that, to that leg ball, hip ball and cut until I can pull that and all of the bone away and chuck it.
And then I haven't messed with removing the knee joint and I haven't messed with cutting the leg groups into a zillion different little pieces. I've still got one giant chunk of meat with the bone pulled out of it. And so that's how I do that. The front shoulder's a little bit more work.
You do kind of have to take a little bit of flaying with your knife to get some of the best meat off of the shoulder blade. And it's not quite as clean of a simple as a process, but that's what I do to debone those four legs. Okay, so I'll put the meat from each hind quarter in its own bag and there's two of your bags there. There's definitely the heaviest chance of meat by far.
Then you've got your front quarters, I'll usually combine the meat from the front quarters and that fills up a third bag. And then the fourth bag, you're gonna have your back straps, your tenderloins and the extra miscellaneous meat that came off of the neck. Now I can't think of the names of the other cuts, but all of your other meat. And so that's what I end up with are those four bags that are full of just meat.
And then the last thing to do is the head. And if you're gonna take just the antlers and you have a saw, then that's great. And then that's pretty self-explanatory. I usually would cut the hair with the knife, or the ears off and shape it the way I want with the knife and expose the bone to do the saw cutting so that you're just running the saw through the bone.
But more often I'm taking the entire head. And the entire head is another thing like the knees that is absolutely doable with just a knife. I don't ever use a saw, I don't even carry a saw actually. I just use a knife to get that very first joint behind the skull, that Atlas joint.
And it's tricky, I can't really explain it without visuals, but it's very possible. And that is where I do like to have a sturdy knife. And so I will use my bigger fixed blade old school knife for that. And then I'll trim that head down.
I'll trim all of the weight off of it. You know, get all the hide off, get the nose off, get the lower jaw, get the eyes, the tongue, all that stuff. If I have time to do all that and I'm a far enough distance where packing it is gonna matter, then I'll take that time to do it. And that can be a huge time suck if you don't know what you're doing.
So, and especially getting a jaw the first few times a person tries to cut the jaw off of a skull, it's definitely involves a lot of technique, but it saves a whole bunch of weight. So, now when I'm getting ready to leave, take my first trip. So I've got the animal all taken apart. I've got four bags of meat and a head.
I'll take all of that meat and I'll move it away from the carcass because you're gonna have critters that are going to want to get on that carcass as soon as possible. And I honestly think that they want the guts and the liver and that kind of stuff more than they want the meat that you cut off and put in your bags. So, I, you know, great. That's theirs.
That's gonna feed a whole bunch of animals in that area over the coming months. And so, I'll move all of my meat, you know, a few yards away at least. And then I'll leave any extra clothes. I'll cover it up.
If I got my extra jackets, anything that's easy to leave there to just kind of deter a bear or a coyote or a fox or a wolf or a badger or martin or weasel, you know, ravens, magpies, I don't think birds. Yeah, so all of those things are gonna want to get on that meat and on that carcass, but I'll cover my meat up with jackets and then I'll piss. I'll try and take a couple of pisses around that area where I've got the meat and leave that carcass for the critters to have. So that way everybody's happy.
And honestly, that's worked. I've left a lot of animals overnight and there is one time when I had critters get on and eat some of the meat, but they were eating the meat that was actually on the carcass and not meat that I had bagged and set aside. So for what it's worth, that's something that has worked for me. Let's see where are we at?
And then, yeah, I mean, as far as leaving an animal overnight, I mean, I do it often. Usually I'm at high elevation where I know the temperature's gonna be down into at least the 50s, more likely the 30s or 40s. So in those conditions, I'm super comfortable with that meat staying overnight. And once it gets really cooled down, I know that meat's gonna be cool.
And having it sit out there in the air overnight is good. And I'll always try and take these bags of meat. And I'll put them on logs. I don't mess with hanging it up.
I just don't, again, some guys will go through the effort of hanging those bags of meat, but I don't think a critter is gonna mess with a meat that's in a bag hanging or even leaning, sitting on the ground when they've got a whole carcass right there instead. So for me, that's never been something I've worried about. But I do try and lean it up against the tree, give at least some of it as much air exposure as possible, as opposed to just laying it fluff on the ground, if possible. I'll even pick it up and just set it in a bush, because even crunching down on a species of sagebrush, there's still a whole bunch of air circulation as it crushes that sagebrush, as opposed to just laying flat on the ground.
And so now you gotta kinda take a look at like, okay, how much can I pack? My pack usually weighs 30 to 40 pounds, but I'm just hunting, because I have a heavy pack and I carry probably too much stuff, but that's what it is. So I'll probably add a hind quarter and a miscellaneous bag for my loadout. And that's gonna be, that's getting me up over 100 pounds.
It's gonna depend, of course, on how far you are from the rig, what kind of terrain. But I'll try and do an elk in three trips, when I'm by myself. I've done an elk in two trips, and that, of course, was crazy brutal. And I've done an elk with two people over two trips, so basically four trips.
So that's all up in the air, depending on everything involved with your specific situation. But you're gonna probably need to be prepared to carry something around 100 pounds, I would say, is something you should be adequately equipped to do. And if I'm a long ways away, I killed a bull a few years ago that I was seven miles from the truck. And with something that far, I did it in shuttle trips, meaning that I took my first loadout and I went halfway back to the truck, and then I dropped it.
And then I went back to the kill site and picked up another load and took it halfway and dropped it. And then I did that three times. So then, at least at that point, it made me feel like, okay, well, now I've got all of the elk halfway back to the truck. And so then from the trips to the truck, it didn't seem as daunting.
So the next trip out to the truck, I also carry an extra pack frame. And I always have that in my truck. So that when I go back with my first load and unload it and unload every, all the other unnecessary things out of my backpack, I have a lighter backpack going in, I just take food and water and just the bare essentials. And then I carry that extra pack frame with me or tie it on or whatever.
So now I have two backpacks. And so now when I get back to the bowl, I'll load two loads together so that I basically don't have to un-tie them as much and transfer it. So I can take that pack out, walk back up and grab the other one, have it ready to go. Let's see, where am I at here?
Whenever I get that meat back, the whole process of handling my meat, I just always try and keep it dry, clean and dry as possible. I know some people will put it in a creek, wash it off. I suppose if you absolutely have to, if it got really dirty or if you had, for some reason, it's stomach contents or urine or something, get on it, you definitely would wanna wash it. But I don't know, like I've always just tried to keep it clean and dry and as much air exposure as possible.
And for that, when it's cool overnight, I'll try and have it opened up if I am back to a camp or staying longer and that meat is gonna be in the field with me and not going straight home. I'll get everything as open as possible overnight so that it gets a real good cool down. And then during the day, I'll cover it back up to insulate that cold and keep it cold. When I do get it to my truck, I don't mess with coolers.
For one, I don't have like five extra coolers, which is how much it would take to put an old elk into. And I also don't like the idea of putting meat into a sealed confined space like that. To me, that doesn't make sense. To me, I want that meat to have air exposure.
So I just put it in the back of my truck. And for the drive home, for that, you know, five hours of driving, even if it does end up being hot when I get back down to town, that meat has been at least getting air blowing over it. And that's always been fine for me. So that's just my program for what I've done.
All right, now that I'm home, I'll take those bags of meat. And unfortunately, we have an extra refrigerator in the garage. And I'll just put those bags of meat in the refrigerator. And I'll take all the shelves out and everything out so that I can fit a whole four big bags of meat in there.
And everything is, to this point, I've been able to bring home meat that's clean enough, dry enough to where I don't have to worry about anything right off the bat. If you did have any compromising issues in the field, you would want to address that right away. All the one thing I will do is now that I'm home, is I'll go ahead and I'll cut that scrotum off just because that scrotum area is especially pungent and bowls, you know, how bull elk are, not all the scents that they like. So it's kind of soaked in, and so it is pungent.
So I'll cut that off of there so that it isn't flavoring the meat for that whole period that I keep it in the fridge because I do keep that meat in the fridge for 10 days on average up to two weeks to let that age meat. And I'll rotate it around, I'll move it, get it as much air exposure to each bag, to each piece as possible. And that's worked for me well so far. When my aging period is done and I decide that I'm ready that this meat's ready to start getting into the freezer, I'll fill up the sink with cold water and I'll bring in one bag at a time or I'll reach into a bag and I'll grab one huge big chunk and I'll bring it into the sink and I'll definitely give it a super good rinse and wash in the sink.
And then I'll take my chunks and I'll start cutting them into steaks. I'll take different muscle groups and I'll, again, there's so much to explain here that you really can't explain, but I cut it apart into chunks that are gonna be, you know, three, four big steaks. I cut across the grain, definitely trim off anything that's basically a good rule, is anything that's white as far as whether it's fat, whether it's connective tissue, whether it's tendon or whatever, I'll trim off, you know, anything that's white. And I'll get a big container on the kitchen counter and as I go through each chunk of meat out of the bag, into the sink, out of the sink, onto the cutting board and then from the cutting board into a big container and I'll have a, you know, like a big turkey pot or we have some big, I don't know what you call them, big deep pans.
And then I can move them into the fridge so that that way the meat isn't sitting on the counter for hours getting warm while I'm doing that process. And then we use a vacuum bagger and yeah, then I'll take, you know, so I may do an entire afternoon or evening of just one bag from sink to cutting board to fridge container. And then maybe another session, get that fridge container out and get your vacuum bag all set up and then go through and put the actual steaks in the vacuum bags. And I label all of my steaks.
I label them BK for backstrap, HQ for hind quarter, FQ for front quarter, NK for neck, TL for tenderloin and then I'll do a couple of big roasts. And then I'll also have a separate container that all of my trimmings go to, not throw away trimmings, but just stuff that didn't fit for a good steak and or sometimes even some of the good steak meat. And that will be my portion that I'll make and save for burger because I make my own hamburger also. And then I may do a big batch or a big bag that I'll label for jerky.
And for my jerky, I use steaks. Like it's definitely not scrap meat. I'd take either a flat out steak or pieces of meat that are too small to be a steak but are steak quality. And so that's what I'll combine for the different types of meat and then I'll bag them up like that and get them into the freezer.
All right, we've covered a lot of ground here. I'll just jump in with a couple more things for how we like to do our meals for our steaks. I like to pull them out the day before and I'll put them on a plate, I'll let them thaw in the counter or in the sink. And then I'll cut them out, I'll give them a good rinse, let a bunch of fresh water run through the bag and pull them out and wash them off.
I'll check for any extra little things I may have missed. Sometimes there's a piece of hair or something like that that does slip by. And then I'll cut them into the size of steaks that we like to eat and I'll kind of cover them in some olive oil, some garlic and some pepper. We like a few seasonings.
I like Montreal seasoning, dry seasoning. I like Old Bay seasoning actually on steaks for a little dry marinade mixed with olive oil. Ali makes a really good chimichurri lately that has been just my absolute favorite. And for that we'll do parsley, cilantro, some garlic, olive oil and salt and pepper and we'll run that in a food processor and have this really, oh, in jalapeno.
Yeah, jalapeno is the key. And have a really green, spicy sauce that is awesome topping on steaks. Don't do it before it's cooked because that stuff burns and it's not good when it's burnt, but use that as a sauce on your steak if you wanna try that. For my jerky, yeah, like I said, I'll use steaks.
I won't use backstrap, but I'll use good hind quarter, front quarter steaks, whatever. For the jerky, like next, not really good for jerky because neck has a lot of white, basically a lot of connective tissue, all of those muscle groups are very tender, it's great meat, but it's not really great for jerky. I like jerky, by nature, is gonna be stiff and hard enough to eat as it is. So by using rough meat on top of that, just seems counterproductive to me.
So I'll just throw some kosher salt. I'll use coke instead of sugar and dab a little bit of A1 and some minced garlic and a little bit of as much water as needed to kinda just get the meat all covered. I'll cut that meat in a quarter inch thickness. I'll throw it in that brine and I'll just have it in the fridge for about two, three hours.
Stir it around a couple of times. And then I've got a big chief smoker and I'll just set that sucker up, I'll get it preheated and fill the racks with that meat and I'll smoke it for six to eight hours kinda depending on the temperature. I put it in my shop during the winter time, it's cold out, I put the box over the smoker too, so it adds a little extra, it keeps, I think, a little bit more heat in there. And yeah, I don't know, I like it.
I give it to other people and it's been described as really good jerky, so that's a win for me. And then I'll freeze it. If I can't eat everything I just made in that batch. Yeah, for burger, I usually try to burger before anything is frozen.
So that kinda has to happen at the tail end of the packaging process. I'll call up Albertsons and let them know that I need some beef trimmings. And if I call them in the morning, usually by the end of the day, they'll have about five pounds. I usually have about 50 pounds of meat that I'll do in a burger.
And so I'll get five pounds of beef fat trimmings. And that's usually, it's been consistently very nice, clean, fresh, good smelling beef fat. And then we've also got just like some of the, some of their bacon too, if to do some squealer burger. That's kind of, you know, like too, if you wanna pick out a little bit of your meat and do squealer burgers, then I'll just get like two or three pounds of their super premium, not packaged, but like from the counter bacon.
And run that through the grinder with the elk, or deer or whatever to make some really fantastic burger. But yeah, we don't own our own grinder. So every year we're bugging our friends to borrow the grinder. Same with the backing banger.
Our friend, the Matt friends Ian and Haley Malepi. We've been borrowing their backing banger for five years in our own own own. Always said, I'm not gonna buy one because the one year I buy one, I'm gonna get scumped. So that's kind of my deal, borrowing all that stuff.
Okay guys, that's kind of covered a whole bunch of this stuff. And if you made it, if you listened to this long, then it must have been interesting and helpful to you. And everyone else has probably hung up a long time ago and they're long gone, but geez, we're at 50. Almost getting close to an hour.
So yeah, hope that was helpful, drop a comment. Hey, also I'm building out a website. And I think it's pretty cool. I'm not really ready to start promoting it publicly yet by the time this goes live and is on the air.
Who knows that maybe old news. But for me at this point right now, I'm really excited about the website that I'm building up. So keep your eyes peeled for that. And yeah, thanks for listening.
We'll talk to you next time. Matt.